Archive for the Flex Category

Attest 3.0 for Flex 4 Certification Study Released!

Posted in ACE certification, Adobe AIR, Adobe Flex, Flex, Flex 4, Flex Certification, Flex/AIR with tags , , , , , , , on September 7, 2010 by devgirl


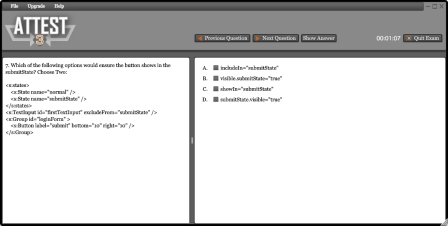
Attest 3.0 is now available for download to use for all of your Flex 4 Certification study needs and help you become an Adobe Certified Expert! Dave and I worked hard writing questions and updating the software to Flex 4/AIR 2.0 while still trying to maintain our day jobs and overcome some hurdles along the way as noted on his PXL blog. We are thrilled to have it out now and you can download it today as either a trial/free version or purchase the full version. The trial contains one free mini practice exam with 30 questions and 99 months of study (the longest trial we could choose with AIR Marketplace), and the full version contains access to all questions and features available for $20. The full version’s random feature allows you to choose a mini or full exam and will never have the same order or content of questions. It also offers an option to show the answers with each question if you want immediate validation and feedback of your answer while studying and has a ‘Study’ feature with specific links to each area to focus on for studying, which is precisely where the actual exam questions are coming from. See Dave’s post regarding the change in maintaining the different versions of Attest this time around if you’re already familiar with this software.

Many thanks to my cohort Dave for all of his hard work on this and all versions of Attest, you ROCK!! He graciously allowed me to be involved in this venture and we’ve proven to make a great team! We plan to continue to add more questions to this version and are interested in hearing your feedback on how we can make Attest better in the future!

The official details of the Adobe Flex 4 ACE exam can be found here. Happy studying and good luck 🙂


The Making of an Eclipse Plug-in – Part 1

Posted in Eclipse, Flex, Flex Builder, Flex/AIR, Java with tags , , , , , , , , on May 4, 2009 by devgirl

I recently had the opportunity to write my first Eclipse plug-in as part of Tour de Flex for Adobe. We had a pretty short deadline for the project and I was a bit hesitant about entering the world of SWT and JFace without previous experience. I did have a good amount of experience coding in Java Swing/AWT previously, but it had been awhile and I had been coding UI’s in Flex/AIR with Java on the server side most recently. Moving back to this “widget-world” was certainly different! I discovered very quickly how spoiled I had been in the Flex/AIR world 😉 I ran into a few kinks along the way in my development that I believe could have easily been avoided and saved me oodles of time had I been able to find some quick information on the web. So now that I have been through the painful task of figuring out how to code, build, package and test an Eclipse plug-in, I decided to write a series of posts to explain the steps I took in creating my plug-in as a sort of quick reference and cut to the chase, as I found myself sifting through a lot of information to find the nuggets I needed.

Before I begin, there are two books I found particularly useful in tackling this project. They are:

Eclipse Building Commercial-Quality Plug-ins
The Definitive Guide to SWT and JFace

The View

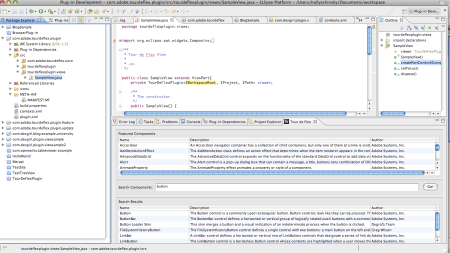
An Eclipse ‘View’ is basically any of the UI tabs within your Eclipse environment, so for instance your Project Explorer, the Console, or the Problems window, that you can drag around to customize your environment. My Tour de Flex plug-in was all contained within one view, so the main things I needed to figure out were all the events and behaviors around showing, closing and sizing a custom Eclipse View panel. A screenshot of my Tour de Flex plug-in view is shown below.
tourdeflexPlugin

And by the way, if you don’t know about Tour de Flex or what the plug-in does, I HIGHLY recommend checking it out! Tour de Flex is a great tool for developers, full of code samples that showcase the language and how to use it. The plug-in can run in either FlexBuilder or Eclipse, and allows you to search code samples provided by Tour de Flex. Double-clicking on a search result will open the Tour de Flex AIR app right to that particular code sample where you can then find out more info or copy/paste code right into your IDE. Instructions for downloading the Tour de Flex plug-in and more information about this useful application can be found here.

Coding a Sample View

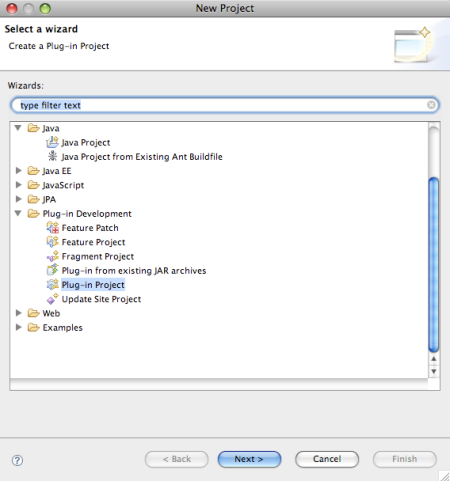
Fortunately Eclipse makes it pretty easy to get started in building a plug-in via a wizard. Using this wizard ensures the necessary base packages needed for a view are included, and includes some sample code to help get you started. To use this in Eclipse, click File | New | Project, and then find the Plug-in Development folder and select ‘Plug-in Project’ from the drop-down menu.
picture-383

You will then be prompted with the following screen, where you will enter the project name and location desired and leave the default selections unless you need to change the required Eclipse base version etc and hit ‘Next’.
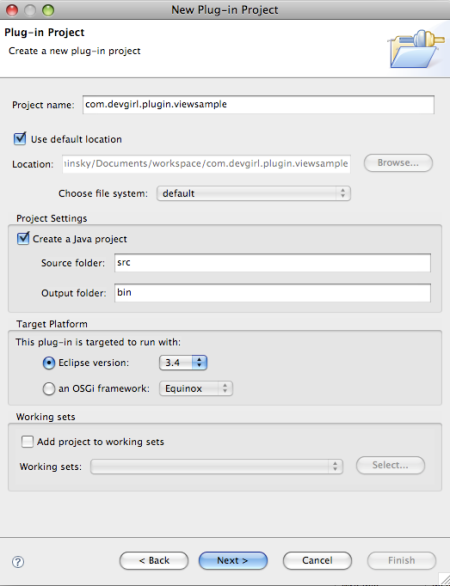
pluginSettings1

The next button will take you to the ‘Plug-in Content’ dialog, where you will stick to defaults once again (except name changes as desired), and leave the default boxes checked. From here you will again click the ‘Next’ button.
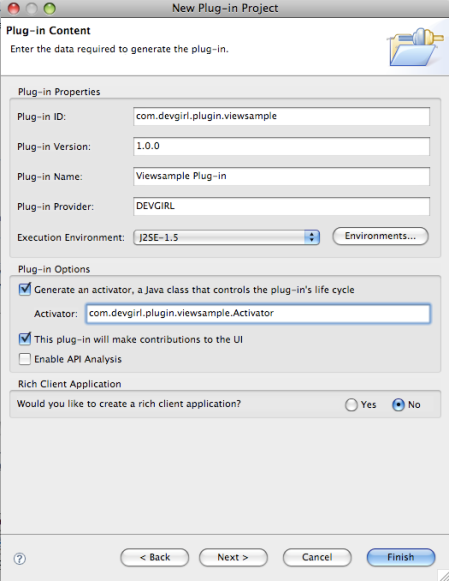
pluginContent

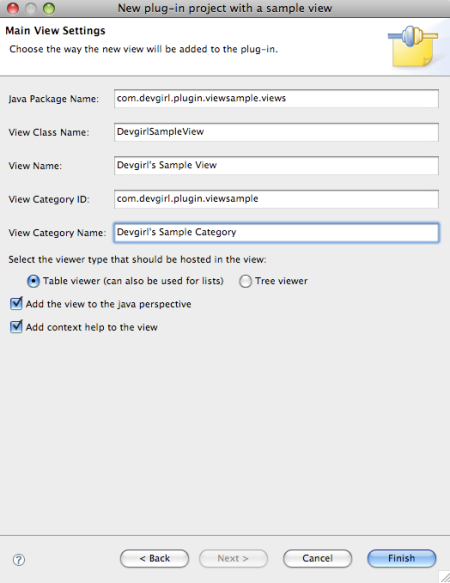
On the following screen select the ‘Plug-in with a view’ option and go through the resulting panels indicating any names changes you might want for your plug-in, otherwise sticking with defaults. For the viewer type, you have two options which apply to the sample code that is contained within your view. You can choose a Table View or Tree View, and this will depend on your own personal view needs. In my case I used the table view and modified it as needed. Lastly hit ‘Finish’ and you will see a new project created with various files and folders needed for your plug-in. Screen shots of those wizard dialogs are shown below for my sample:
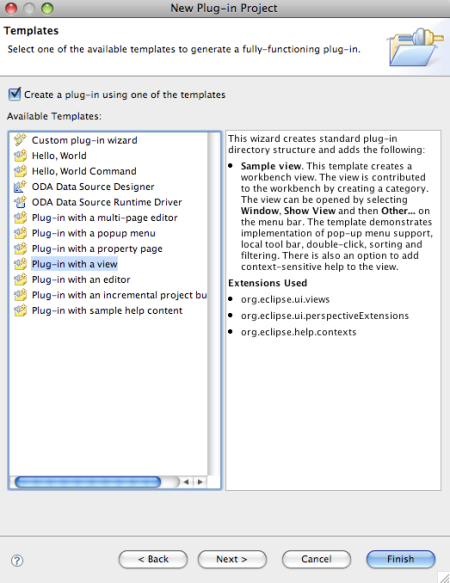
pluginSettings3
pluginSettings4

To see what the sample plug-in you just created looks like, or to test any plug-in for that matter, you can right click on the project in the Package Explorer and select the ‘Run as… Eclipse Application’. This will actually open a new running instance of Eclipse with your plug-in activated in that instance. Another way to test/run it is from the ‘Overview’ page of the plug-in that was created, under the ‘Testing’ section, via the option that says ‘Launch an Eclipse Application’. This page is your entry into all of your plug-in settings, and you will see tabs at the bottom that allow you to flip through each page of settings. More about these settings and how to use them will be explained in Part 2 of this series.
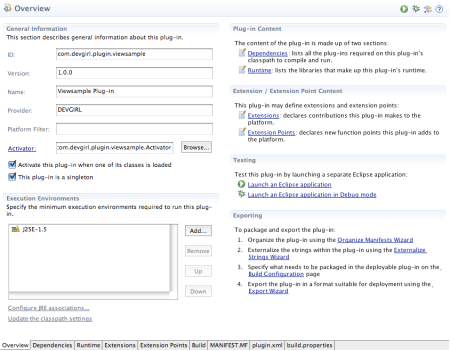
pluginOverview

So now that we know how to launch an Eclipse application for testing our plug-in, we need to go into that instance to find our new view. Once in the test Eclipse instance, go to the ‘Window’ menu and find the ‘Show View’ option. This will bring up a list of all the view categories, and you should now see your new category in the list, and under it your sample view. Once you find your newly created view, select it and hit the ‘OK’ button.
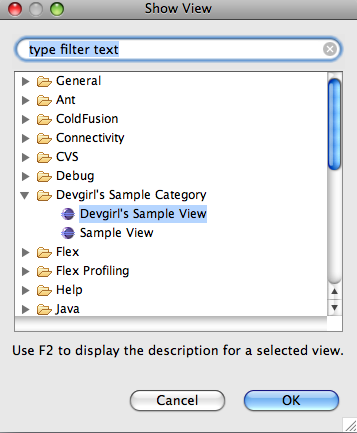
newView

The new sample view will be opened immediately for you to see with a basic table as shown in the screenshot below.
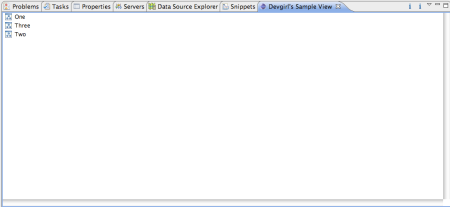
finalViewSample

Congratulations! You have just learned how to create your first basic plug-in! In Part 2 I will take a deeper dive into the files that were generated as a result of the above, discuss some caveats to watch out for during coding, and also take a closer look at the plug-in settings tabs.

Tour de Flex – Web Version Released!

Posted in Adobe Flex, Flex, Flex/AIR with tags , , on March 30, 2009 by devgirl

Tour de Flex - Web Version

Tour de Flex - Web Version

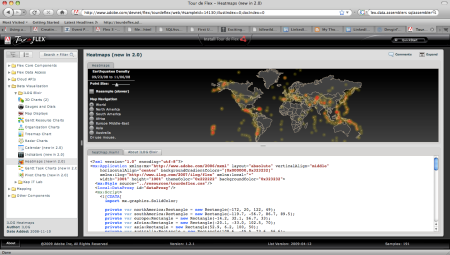
Tour de Flex for the Web was released today! It’s hosted on the Adobe Devnet site where we also now keep the Tour de Flex AIR app download, and looks almost identical to the AIR version, minus the AIR-only samples for obvious reasons.

The web version contains deep linking integrated into it so it’s now very easy to bookmark samples for later reference, or to email a sample to a co-worker etc… This version is also a great option for those who are new to Flex or might want to explore it, but are not ready to download the full AIR application. When they are ready to download it, all they have to do is hit the Install button at the top of the page to get it.

I had some unique challenges in creating the web version, since we use HTML links to supply our content (in the form of SWF or HTML) for all of our tabs within the illustrations and documents, and obviously could not use the handy dandy HTML component as our AIR app used. Christophe Coenraets had been down this path before and suggested using iFrames to hold the content in the tabs, and advised on how he had done something similar, so that is the path we chose. The final result took a little bit of trickery to make the iFrames behave with the resizing of the browser window, popping up and hiding of other windows etc, due to the z-order of the iFrame always taking precedence over the Flex component, but ultimately worked! I plan to write another post about how this was done in case it may help others who need to build something like this in the future… so check back soon!

Also, be sure to check out Greg Wilson’s blog for the rest of the info on the Tour de Flex 1.2 AIR app updates and more!

Get Flex/AIR Certified! Attest 1.5 mock exam AIR app released – FREE!

Posted in Adobe Flex, Flex, Flex/AIR with tags , , , , , , on March 27, 2009 by devgirl

Recently I decided to research getting my Adobe Flex 3/AIR ACE Certification and quickly found there was not a whole lot in the way of test preparation besides using the Adobe LiveDocs and the various books on the subjects. What I really wanted was the ability to take a mock exam and see which areas I might not be as proficient in and need to study further. I stumbled across some software called Attest, developed by Dave Flatley of PXL Designs, Inc that was developed for the Flex 2 ACE exam and inquired about a new version for Flex 3/AIR. Dave let me know he was working on an AIR version for it and I offered to help him work on getting it finished up, released and tested. We have been working feverishly to get the AIR app finished and testing complete, and I’m happy to announce we have released Attest 1.5 Beta today! It is FREE, yes folks, FREE!! for developer use, and I HIGHLY recommend downloading it and using it for your exam preparation, or even just for fun to see how much of a Flex/AIR expert you really are ;).

Keep in mind this is beta, but Dave and I carefully tried to be sure to hit all the different topic areas the test covers, and gladly welcome suggestions and feedback to how we can make it better. We will continue writing questions and adding to it, and with the beauty of AIR, you will get all of our exam updates without lifting a finger after you’ve installed it! There are currently two full exams that mimic the actual exam, as well as three mini-exams. The exams are timed just like the real thing, and we provide a nice bar chart of your results when you’re through to show you how you scored in all the different subject areas. Last but not least, and one of the most useful parts of the app in my opinion, is that we show each answer you selected incorrectly, and provide feedback about the question as well as links to the Adobe LiveDocs pages that explain that particular question further.

So grab Attest here and let us know what you think!

Adobe Flex/AIR Certification?

Posted in Adobe Flex, Flex, Flex/AIR with tags , , , on March 3, 2009 by devgirl

So I’ve been contemplating studying for and taking the Adobe Flex 3 with AIR exam to become an Adobe Certified Expert (ACE) and thought it would be good to solicit some feedback from the community. I would love to hear any details about how it may have helped you if you’ve already earned your certification (or if it seems to have made no difference), or any other details on the exam as far as how difficult or easy you found it, how you studied etc… I have always had mixed feelings on the whole idea of being certified, since you are essentially memorizing a lot of information that is readily at your fingertips, however in this economy it seems like a good idea to do as much as you can to set yourself apart in the industry. I suppose you really do have to understand some concepts a bit more thoroughly to pass an exam like this, and it ensures a breadth of knowledge beyond what you may have gotten from specific project-based work. Thoughts? Comments and feedback welcome!!!

Data Binding Gone Wild!

Posted in Adobe Flex, Flex, Uncategorized with tags , , , , , on October 29, 2008 by devgirl

The ability to base a property of an object off a dynamically changing value is a benefit of data binding that is often unknown or overlooked by Flex developers. However it is an extremely valuable feature and can save a lot of time coding and handling various events, not to mention much cleaner code! This is particularly true for those properties requiring a boolean, such as ‘enabled’ or ‘visible’. The toggle can be done during execution based on a certain sequence of events. The code returning the value for the property can be included within the binding brackets in the case where minimal code is needed to derive the value, or via a function call that returns the value. The following code excerpt shows how this can easily be done in your Flex application. It basically sets the ‘enable’ property of the Delete button to a dynamically derived value that indicates whether a row in the grid has been clicked. Simple as that!

<?xml version="1.0" encoding="utf-8"?>
<mx:WindowedApplication xmlns:mx="http://www.adobe.com/2006/mxml" layout="absolute">
	<mx:Script>
		<![CDATA[
			import mx.collections.ArrayCollection;

			private var employeeCollection:ArrayCollection = new ArrayCollection([
				{id:1, firstname:"Tom",lastname:"Taylor", position:"VP Sales"},
	                        {id:2, firstname:"John",lastname:"Jones", position:"Operations"},
	                        {id:3, firstname:"Margaret",lastname:"Miller", position:"VP Marketing"},
	                        {id:4, firstname:"Sarah",lastname:"Sanders", position:"VP Finance"},
	                        {id:5, firstname:"Ron",lastname:"Roberts", position:"Product Manager"},

			]);
			private function onDeleteBtnClick(event:MouseEvent):void
			{
				employeeCollection.removeItemAt(emplDataGrid.selectedIndex);
			}
		]]>
	</mx:Script>

	<mx:VBox left="10" top="5" width="480">
		<mx:DataGrid id="emplDataGrid" dataProvider="{employeeCollection}" width="480">
			<mx:columns>
				<mx:DataGridColumn dataField="id" headerText="Employee ID"/>
				<mx:DataGridColumn dataField="firstname" headerText="First Name"/>
				<mx:DataGridColumn dataField="lastname" headerText="Last Name"/>
				<mx:DataGridColumn dataField="position" headerText="Position"/>
			</mx:columns>
		</mx:DataGrid>
		<mx:Button id="deleteBtn" left="10" label="Delete Employee" 
			click="onDeleteBtnClick(event)" 
			enabled="{emplDataGrid.selectedIndex > -1}"/>
	</mx:VBox>
</mx:WindowedApplication>

Comments welcome 🙂